
TLDR: How to deploy a project onto your own personal server, from localhost to yourservername.com
Deploying an Node.js app to a Personal Server
In programming courses, most of programming occurs in the development phase of a project (my pc), and localhost was enough, we were never taught how to fully deploy a node.js project to a server. Yet, this is vitally important when entering the production phase of an application. Here we discuss a simple way to deploy an app through github actions and its self-hosted runner functionality. We aim to deploy this project onto our own server.
Requirements
This assumes you have a github account, a server with root access, and are able to open and map ports (access port 3000 on server).
Node.Js Application
On your local computer, lets create a simply node application. First create your project directory, DeployNodeApp, and create app.js with the following content
1
2
3
4
5
6
7
express = require('express');
const app = express();
const port = 3000;
app.get('/', (req, res) => {
        res.send('Hello World!');
});
app.listen(port, () => console.log(`Example app listening on port ${port}!`));
Before running, we need to install express, with npm install express. Then lets run it with node
1
2
node app.js
Example app listening on port 3000!
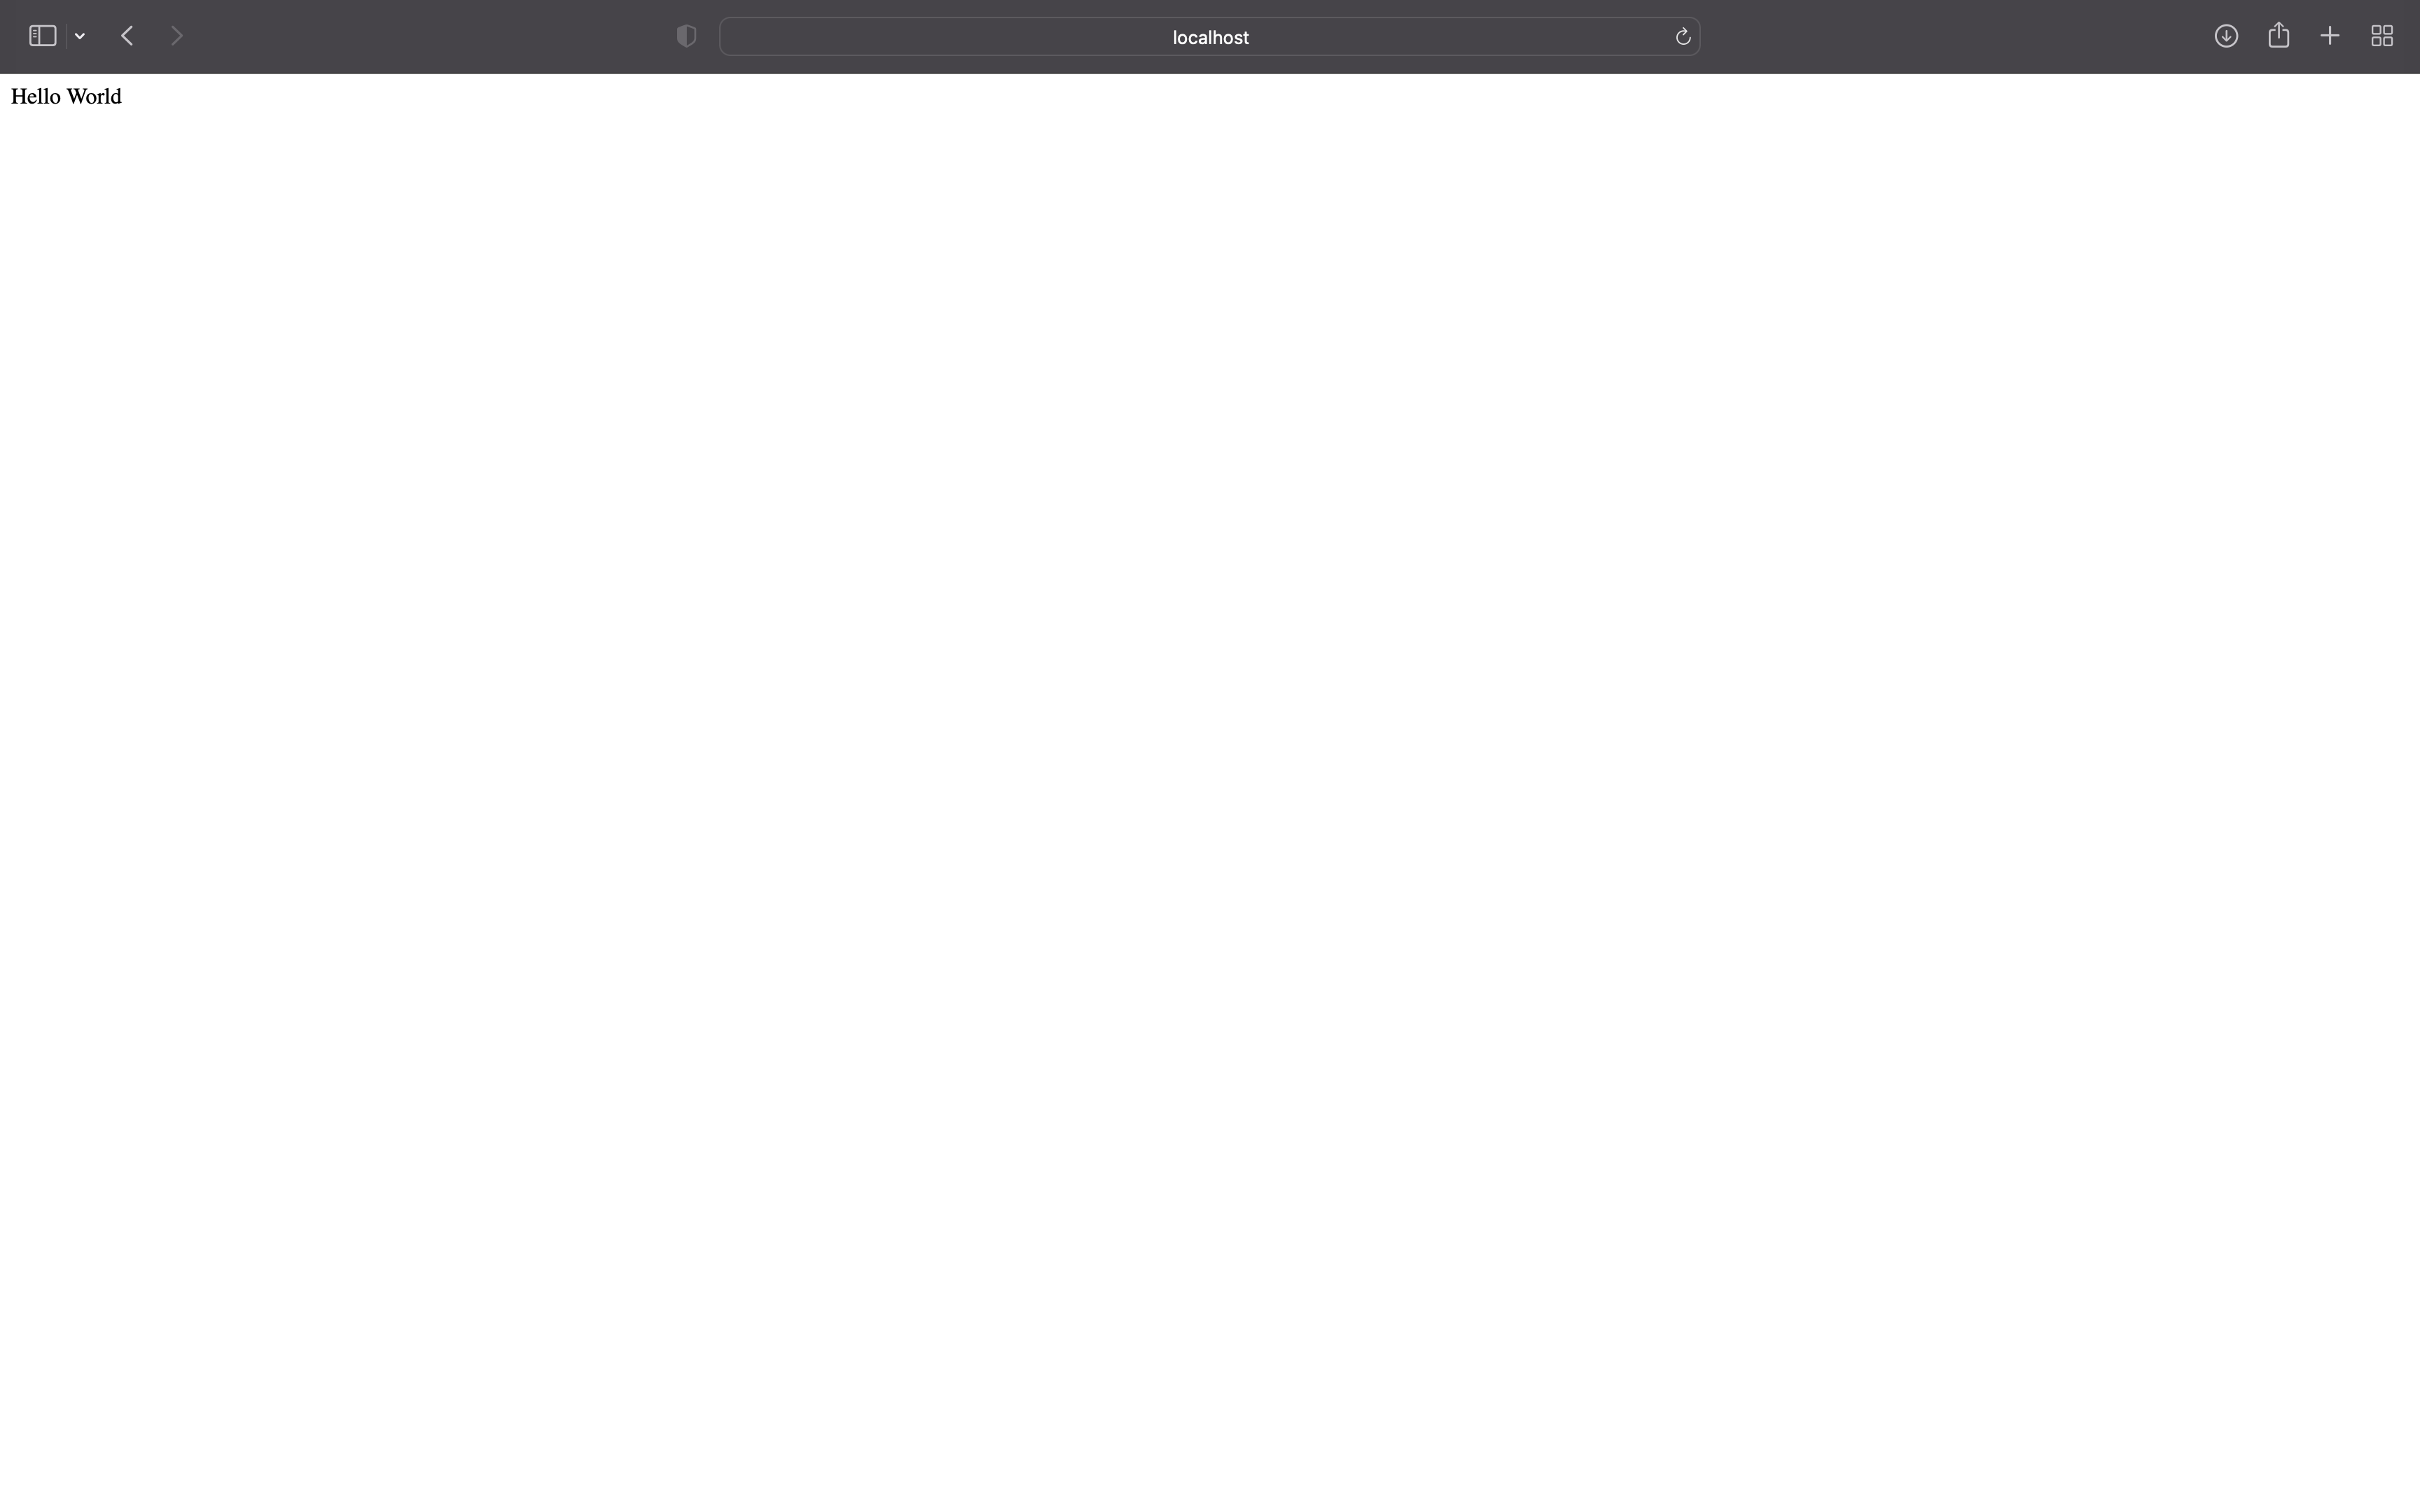
And if we go to localhost:3000, we can see our simple app.
I am using node version
1
2
node --version
v12.0.0
Github Repository
Next go to github to create a new repository. Follow the directions for an existing project.
Before pushing, make an .gitignore with
node_modules/in it, you do not want to push this folder onto github.
Workflow
Next, lets create a github action workflow. In your project directory, create .github/workflow/main.yml with the following contents.
1
2
3
4
5
6
7
8
9
10
11
12
13
14
15
16
17
18
19
20
21
22
23
24
25
name: CI
# Controls when the action will run.
# In this case, it triggers the workflow on push or pull request events but only for the main branch
on:
  push:
    branches: [main]

jobs:
  # This workflow contains a single job called "deploy"
  deploy:
    # The type of runner that the job will run on
    runs-on: self-hosted
    strategy:
      matrix:
        node-version: [12.x]
    # Steps represent a sequence of tasks that will be executed as part of the job
    steps:
      - uses: actions/checkout@v2
      - name: Use Node.js $
        uses: actions/setup-node@v1
        with:
          node-version: $
      - run: npm install
      - run: npm run build --if-present
      - run: npm test
Commit this new workflow file, and push it to your repository. Under the Actions tab in github, we can see a failed runner. So, lets set up our self-hosted runner.
Github’s Self-hosted Runner
Lets set up the github runner. Go to your github repository, under Settings > Code and Automation > Actions > Runners
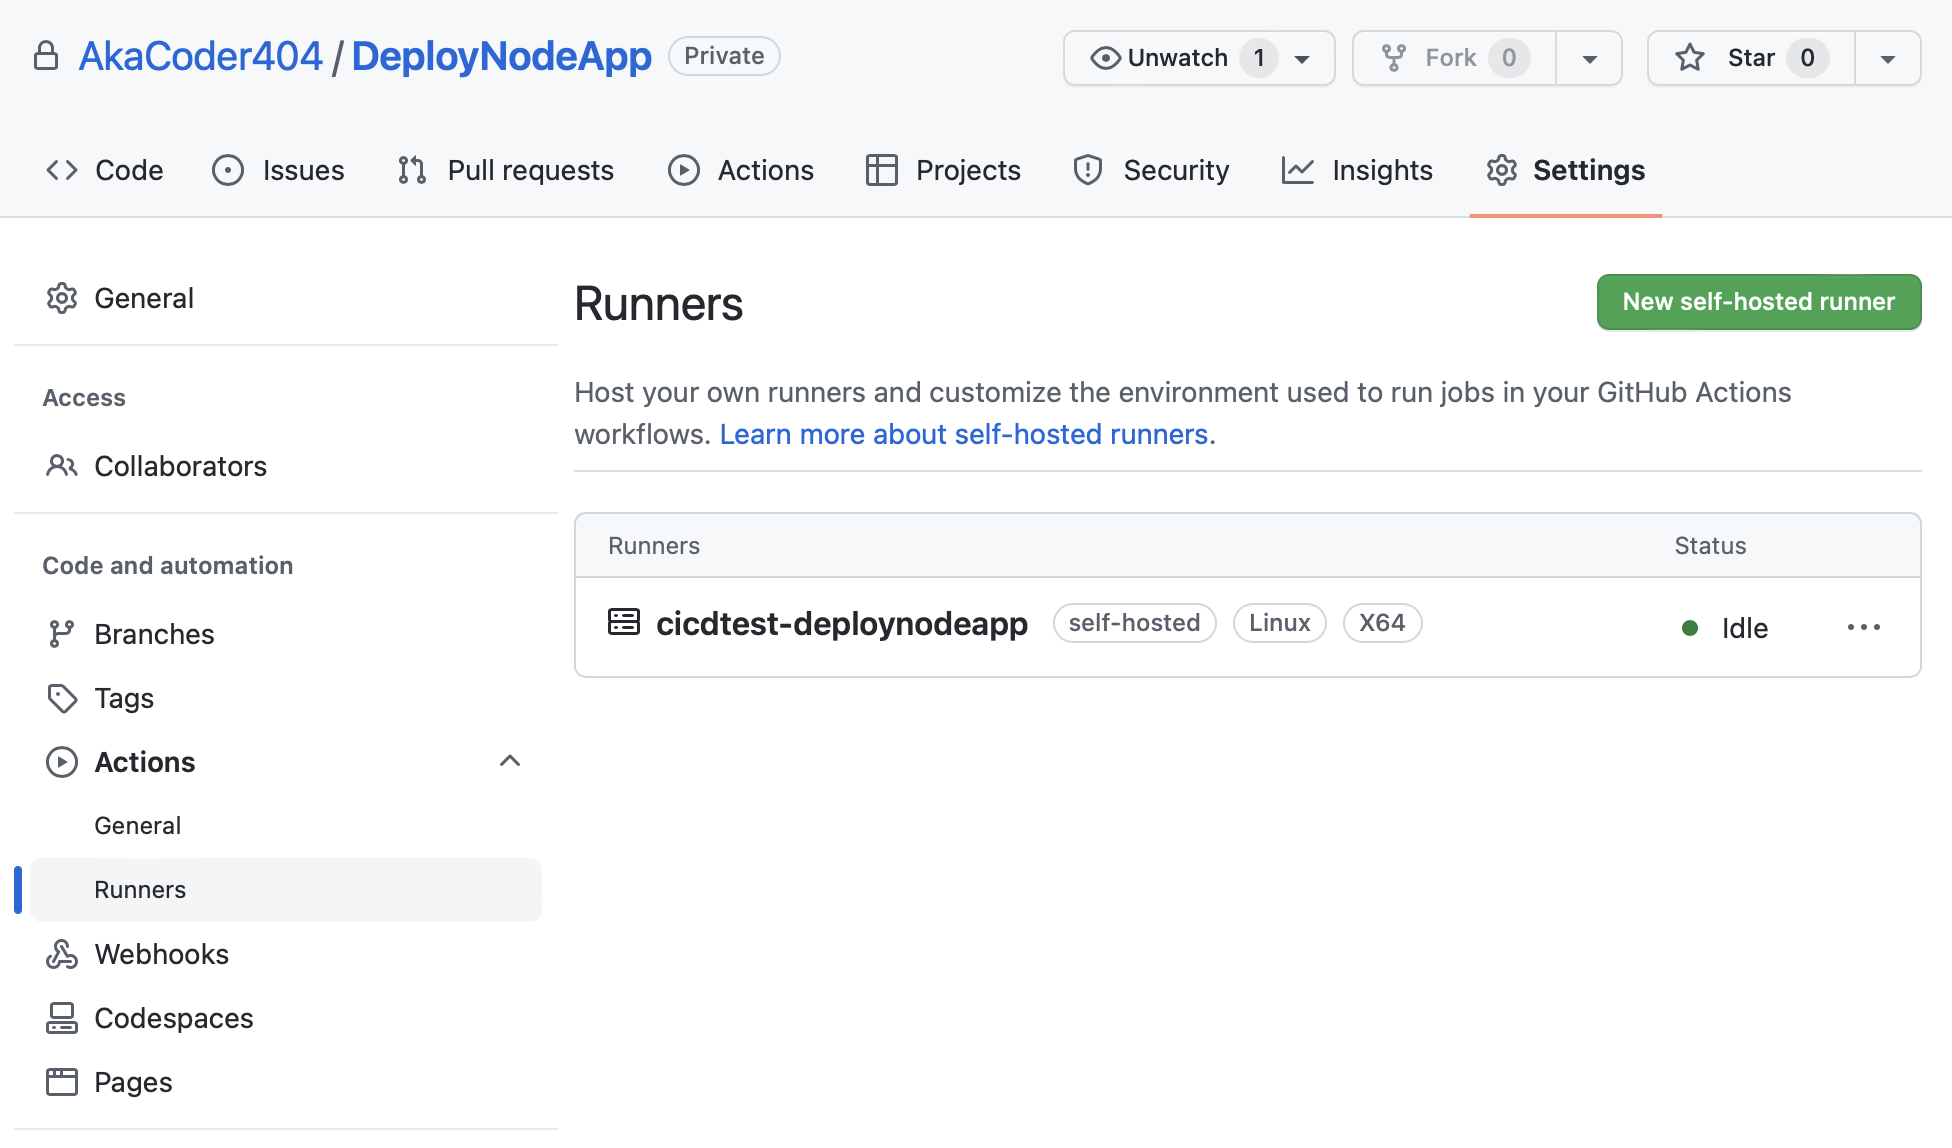
Click new self-hosted runner. Choose your operating system and architecture.
Then, ssh or log on to the server that will host your webpage. Create a directory for your project. Inside that directory, lets download the runner.
1
2
3
4
5
6
7
8
# Create a folder
$ mkdir actions-runner && cd actions-runner
# Download the latest runner package
$ curl -o actions-runner-linux-x64-2.299.1.tar.gz -L https://github.com/actions/runner/releases/download/v2.299.1/actions-runner-linux-x64-2.299.1.tar.gz
# Optional: Validate the hash
$ echo "147c14700c6cb997421b9a239c012197f11ea9854cd901ee88ead6fe73a72c74  actions-runner-linux-x64-2.299.1.tar.gz" | shasum -a 256 -c
# Extract the installer
$ tar xzf ./actions-runner-linux-x64-2.299.1.tar.gz
Then lets config it. Replace YOUR_TOKEN with the token it gives you.
1
$ ./config.sh --url https://github.com/AkaCoder404/DeployNodeApp --token YOUR_TOKEN
It will ask you to input the name of the runner and the name of the work folder. Use any name. I have called the runner cicdtest-deploynodeapp and set the workfolder to be default, _work.
Lets rerun the workflow on github by clicking the Re-run jobs button in the Actions tab in the GitHub repository. If we log into the server, we can see that repository is cloned inside the _work directory, and npm dependencies are installed. Now it’s simply a matter of starting the server.
Daemonize the NodeJS Application
The guide says to run ./run.sh, but before doing that, lets set up pm2 to daemonize the node application. In our node server, go to your project directory and go into the _work folder. In it, we can see that our repository is cloned inside with all the dependencies installed.
pm2 is a process manager that manages applications for us. You could also do this by creating services manually. But I believe using pm2 is must simplier.
After pm2 is installed, lets run pm2 start --name=NodeApp app.js to start your node application.
Then to see the status of our application, run pm2 list
1
2
3
4
5
┌─────┬────────────┬─────────────┬─────────┬─────────┬──────────┬────────┬──────┬───────────┬──────────┬──────────┬──────────┬──────────┐
│ id  │ name       │ namespace   │ version │ mode    │ pid      │ uptime │ ↺    │ status    │ cpu      │ mem      │ user     │ watching │
├─────┼────────────┼─────────────┼─────────┼─────────┼──────────┼────────┼──────┼───────────┼──────────┼──────────┼──────────┼──────────┤
│ 0   │ NodeApp    │ default     │ N/A     │ fork    │ 1104377  │ 15h    │ 2    │ online    │ 0%       │ 50.4mb   │ aka… │ disabled │
└─────┴────────────┴─────────────┴─────────┴─────────┴──────────┴────────┴──────┴───────────┴──────────┴──────────┴──────────┴──────────┘
We can see that our application is online, and should be running at the port 3000. If you can access port 3000 on your server, you can see your application running at yourservername:3000.
In order to check whether your server is listening for something on port 3000, use the command sudo lsof -i -P -n | grep LISTEN and see if port 3000 is being used.
Connecting the Runner
Now we must make sure that the runner is listening for jobs in the background. In otherwords, it is waiting for a push to the master. Go back to the actions-runner directory and run the following command
1
2
sudo ./svc.sh install
sudo ./svc.sh start
Then add the following line to main.yml file in your repository.
1
2
3
4
5
...
    - run: npm install
    - run: npm run build --if-present
    - run: npm test
    - run: pm2 restart NodeApp # add this line
Then, commit the changes, push to server, and look at the Actions tab to see that the action has successfully completed. Now, your application is deployed to yourservername:3000. The production application will update automatically whenever the main branch is pushed to. Thus, we can seperate our development and production phase. We develop on our own pc, while our application is being hosted on our server.
Futher Reading
We have successfully deployed an application to a server, so what’s next?
- configure nginx reverse proxy
- buy an domain name for server
Debugging Issues
Some issues you may have encountered and their solutions
Thanks for Reading!